The world around us is beautiful. If we slow down our footsteps and take a moment to enjoy the beauty around us, we will realize that there are wonderful colours in our surroundings. The different shades of green in the leaves of the trees, the vibrant red and yellow ixora flowers commonly found in our neighbourhoods, the vivid blue skies on a clear day and if we are lucky enough, we may even witness the beauty of a real rainbow! Inspired by the fascinating colours of nature, here are a few things C and I have done that involve rainbows!
Prism Experiment
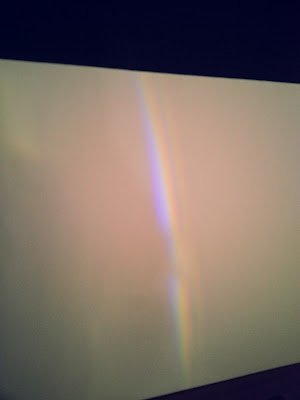
This experiment is a great way to understand how rainbows are formed. Basically light travels in straight lines. However, when it passes through a denser medium like glass, it can be bent. When white light passes through a clear glass prism at a certain angle, it can be dispersed into colours of the spectrum from the longest to shortest wavelength -> red, orange, yellow, green blue, indigo and violet.
A similar scenario occurs when a rainbow is seen. When sunlight passes through raindrops at certain angles, the light from the sun is dispersed into the various colours of the spectrum.
Here, I have used an old lighting cover that is made of glass. Technically, we will need to use a glass prism like this. However, when experimenting around with the glass cover, we realized that if the light from the torch is shone at the correct angle, we were able to disperse the light into the different colours and achieve a tiny rainbow (as shown in the images below). C was thrilled to observe this and can now comprehend how a rainbow is formed!
 |
| A tiny rainbow! |
Rainbow Cake
The other day was C's uncle's birthday, and she wanted to make a birthday cake for him. After some discussion, we decided to go with a fun rainbow cake! We used a really simple recipe that we had learnt at C's baking class, and it's pretty foolproof. Here are the ingredients:
- 75g flour
- 75g sugar
- 9g ovalette (it's a cake emulsifier)
- 3 whole eggs
- 1/2 tsp vanilla essence
- 68g melted butter
- food colouring
Step 1. Place the flour, sugar, ovalette, eggs and vanilla into a mixing bowl.
Step 2. Mix on medium speed and once all the ingredients are mixed relatively well, bump up the speed to the maximum your mixer can go. Mix on high speed till the mixture is light yellow in colour with a thick consistency. Remove bowl from mixer.
Step 3. Gently fold in the melted butter with a spatula.
Step 4. Measure out cake mixture into 6 equal batches and place in separate bowls.
Step 5. Add food colouring to each bowl to get red, yellow, orange, green, blue and purple. You can mix the colours to achieve the secondary colours. E.g. Red + Yellow = Orange, Yellow + Blue = Green, Red + Blue = Purple
Step 6. Pour cake batter into baking pans and bake at 180 deg Celsius for 15-20 minutes.
Step 7. Remove from oven and let cool before frosting the cake.
 |
| C was thrilled to help mix the colours into the cake mixture! |
 |
| We used Wilton Cake Pan Set for easy layers! |
 |
| Rainbow Birthday Cake done! C was a great help with the sprinkles! |
Rainbow Craft and Activity Worksheet
 |
| Download writing worksheet here. |
 |
| Download here. |
Make Your Own Rainbow!
This is a fun activity to learn the colours and sequence of the rainbow! Red, Orange, Yellow, Green, Blue, Indigo and Violet! C had fun cutting out the coloured arches and applying glue to create her own rainbow! The focus is always on the process rather than the result.
 |
| C happy with her rainbow! |
 |
| Some writing practice. |
Density Experiment with Colours!
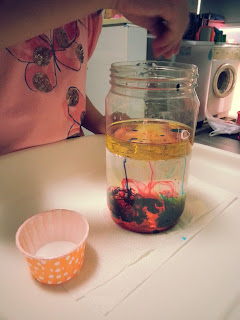
This experiment explores the different densities of water and oil, while utilising colours to show the movement of the salt, water and oil. You will need:
- Clear container or glass
- Water to fill at least half of the container
- Oil
- Salt
- Food Colouring
Step 1. Pour water into the clear container.
 |
| C helping to set up the experiment. 1st step, pouring water into the bottle. |
 |
| 2nd step, C pouring the oil into the bottle. |
 |
| Oil settles on top of the water as it is less dense. |
 |
| C adding the food colouring. |
 |
| The food colouring settles together with the oil on top of the water as well. |
 |
| C adds more colours in. Almost all the colours of the rainbow: Red, Orange, Yellow, Green, Blue and Purple. |
 |
| C sprinkles salt into the bottle. The salt falls in, and carries the food colouring and a bit of the oil down into the water as salt is heavier. |
 |
| When the salt dissolves into the water, the oil that was carried down floats back up to the top of the water. This movement moves the coloured water around. |
 |
| Appreciating the movement of the oil and water via the colours! |
 |
| It's like watching a beautiful rainbow dance as the salt, oil and coloured water move around within the bottle! |
Recommended Books about Rainbows!
Meanwhile, here's a list of C's favourite books that talk about the colours of the rainbow!What Makes a Rainbow? by Betty Schwartz
A cute story about a little rabbit discovering the colours of the rainbow. As you flip through the pages of the book, ribbons of colours appear!
Let's Look for Colors - Mickey Mouse Clubhouse
A lift-the-flap book where Mickey and his friends look for things of different colours of the rainbow to bring to a picnic!
Esther's Rainbow by Kim Kane & Sara Acton
A book about a little girl named Esther who sees a rainbow one day. After it disappears, she starts searching for it through the days of the week.
I hope you all enjoy the rainbow fun activities above, and let us all appreciate our beautiful and colourful world! :)


